Saturday, October 31, 2009

Something Pumpkin: Roasted Pumpkin Seeds

Back on the wagon participating in the "Flavor of the Month" over at Bake at 350..
It helps that we are out of boxes, we weren't there a month ago.. or the month before that. :)
This month's challenge: Pumpkin.
While my recipe isn't typically what one would consider a pumpkin recipe, it does utilize a very integral part of the pumpkin.

Roasted Pumpkin Seeds

What you'll need:

washed pumpkin seeds (all the goo gone..)
butter or margarine
garlic salt
Worcestershire sauce

I like to use my strainer to collect all of my seeds while we are cleaning out our pumpkins during that fun carving process. It is great to take it right over to the sink to wash all the stuff off the seeds.


After washing your seeds and getting all the goo and slimy stuff gone, lay paper towels on a cookie sheet, spread them in a single layer and allow to dry. They will need to dry at least overnight, until they are no longer damp, and you can't bend them. Sometimes they need more drying time and depending on the amount of seeds, you'll need more paper-lined cookie sheets.


Melt your butter or margarine and add 2 tablespoons of the Worcestershire sauce, a teaspoon or two of the garlic salt. Mix well, and add your dried seeds. (Again, if you have more than one pumpkin's worth of seeds, you may need more of this.) Toss the seeds in this mixture to coat them all well.
Dump seeds onto an un-greased cookie sheet, salt lightly and put in a 200 degree oven for about 2 hours. Check as you get close to the 2 hour mark, they might need less time or more.
You are looking for a crunchy, savory, delicious pumpkin seed that you won't be able to stop eating.


We have tried mixing it up and adding other flavors, but we keep coming back to this.
I have no idea how long they keep because they never last more than two days at my house. :)
Super easy, super yummy!!

Friday, October 30, 2009

Cheesy Potato Soup..


This is a classic fall recipe in my house.
I have fond memories of my mom making it.. fond memories of helping her grate the cheese and learn how to make roux.
It's really easy, very tasty, and simple!

Ingredients:

5-6 potatoes
chicken bullion (about 2 teaspoons)
1 cup flour
1 cup butter or margarine
milk
grated cheddar cheese (about three cups)
paprika
salt and pepper to taste
cooked bacon, chopped (optional)

Peel and cube potatoes. Place in a large pot and cover potatoes with water. You don't want too much water, just enough to cover the potatoes. Boil until tender then reduce the heat. Add the bullion, and the salt and pepper. In a smaller sauce pan, melt your butter or margarine. Once it is all melted, stir in the flour while the pan is still on the heat. Stir until it is a smooth paste. Reduce heat and add milk, whisking it until it is a smooth, thickened mixture. (This is your roux.) Add this at once to your potatoes and water. Stir continuously to make a smooth, thick soup. Add 2 cups of the shredded cheese and continue to stir until it is all melted. Sprinkle some paprika in to add color and a slight flavor. Dish up and top with more cheese and bacon. We like to have it with warm bread.

Thursday, October 29, 2009

Sequins..

This is what I did today:


While I was fully aware that you can purchase pre-strung sequins, and simply glue them to a project, I opted for the single, sew as you go sequins. It was fun and relaxing, I really needed that second part..

Wednesday, October 28, 2009

Tips & Tricks..


Not sayin' you all want to make my delightful yet jacked-up cake, but here are some tips I have learned along the way.
- I do not make my cakes from scratch, I do my brownies, but not my cakes (gasp!! I know.. I am now less of a woman than you thought..) and my FAVORITE cake mix is the butter recipe variety.
YUM.
- Wrap your cakes in foil and freeze your cakes immediately after they finish the recommended cooling time to turn out of the pan.
These two things make for a really moist cake.
In making the fondant, USE THE POWDERED SUGAR! Really. In most recipes, I do not always use that amount, sometimes more, and sometimes less, but with this, don't be shy.. use a lot. (But add it a little at a time..)
- Ganache.. it is delicious and so tasty.. but let me help. The first time I made it, the recipe did not state to whip the cream and chocolate mixture. WHIP IT. Let it cool, and then whip it. If you are using it as a crumb coat, chill it, but let it be a little soft to spread.
Just some tips.
Hope you enjoy them.
We enjoyed the cake. :)

Monday, October 26, 2009

Busy as a bee..

Keeping busy lately, seem to have something going on in every corner of my life these days!
Today, I took some gummy bears for a dip...


Then started a cake using this awesome fondant recipe..
Peyton loved the chocolate ganache filling..


I have to admit that I got really tired toward the end.. can't wait to have some. Maybe for breakfast? ;)


In my defense, we were carving pumpkins at the same time...


And I am done with 4 out of 9 loads of laundry.
Whew!! And finishing up the craft room in the process.. any more guesses on the color(s)?

Friday, October 23, 2009

My headache is going away..

Not so bad with the blue gone now, is it? :)


Now if SOMEBODY can guess what color is going over this most awesome primer, I will give you some sort of prize...
Guess my accent colors, and, well, you can get a prize too. :)

Thursday, October 22, 2009

An After..

Remember these chairs?
Well, I said I would post the afters..
The now BLUE chair kind of had it's own reveal..
Here is this one..


After going through various options in my head, I decided to prime the frame with automotive primer, and paint it a bright silver.
I wanted to re-cover it in vinyl, but couldn't find just what I wanted, so I got creative with Duck tape.
Not your ordinary Duck tape..
"CHA CHA CHERRY" Duck tape..
I like it, but may be altering it later if I find something I love more..
Right now, it sure is easy to clean! ;)

Tuesday, October 20, 2009

Favors..

Merrill's sweet cousin is getting married (or hitched as I like to call it on occasion.. ;D) and her family is throwing her a bridal shower...
Because I have a thing for small packages filled with sweet stuff, I offered to put together some favors..
I made the simple mints and piped their initials on them with white chocolate.


I got M&M's in their wedding colors to have as a nice little bed for that yummy mint..


And tags.. love my scrapbooking stuff that is not just for scrapbooking!!

Matching ribbon and the tags and I am done!!


I so awesomely got these boxes on clearance at Micheal's..
I am loving the bargains lately!!

Sunday, October 18, 2009

I (heart) vinyl..

I love it for so many reasons..
I love that it is so easy.
I love that it changes a room with little effort.
I love that it comes in so many colors!
I was playing a lot with it yesterday and still have a few more projects to finish...


The only thing funner was finding fun quotes on the net..

Saturday, October 10, 2009

Thrifty!!

Here's another peek..


If you know me, I won't post it until the WHOLE area is complete. :)
But I was in need of a special chair for my special little desk. I saw this a while ago, and loved it!! I have been dreaming ever since.
I put on my hunter orange (okay I really didn't do that..) and went hunting.
It also added to my list of good reasons to go to the DI.
On that list:
- 2 garbage bags worth of clothing and shoes
- 3 boxes (2 of which barely fit in my trunk..) of other household goods no longer employed by this particular household.
Went there and found no success.
A lot of fun people, but no success.
I was thinking of somewhere close to go, and stopped at the thrift store on Wall Avenue where U & I furniture used to be..
I went there with my parents when I was 3 to get my bedroom set.. the salesman kept playing footsie with me.. creepy.
Now I wonder if I was the one who started it... hmmm.
Anyway, there I found success, in triplicate.


I really wanted at least 3, and I got 'em!
So here's the before, and I will show you afters of each when I get there.
Total I paid $21.95 for the trio.


Not too shabby, eh?

Thursday, October 8, 2009

A sneak peek..

Here's another project in the works:


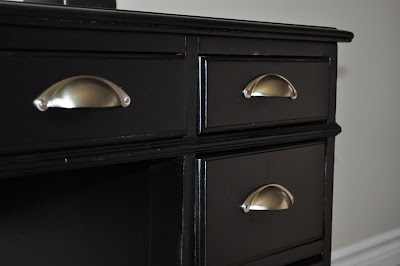
The previous owners of our home left this behind. I was hoping they would! :)
Once the pres (thanks Nat!) and I started to move it out of Peyton's room, I could see a reason why they just might have wanted to leave it.
It's kinda rickety.
But it is on it's way to looking awesome!!
Stay tuned..

The Butterfly Project..

I had mentioned the butterflies would be taking flight, and while it took a bit longer than I wanted for them to take off, they have.
Flight took off a while ago actually, but with all of this moving fun, it took me even longer to get to this post. :)
The first step is to find an outline to use for tracing purposes and print it off in various sizes to get you different sized butterflies.
I used a FREE PhotoShop brush, found here.
I stamped it down on my project sheet, then stroked the outline to get my lines. I printed it off and used one of my favorite tricks to get the lines on to the wood.
You pencil in a wide line over the printed line (sloppiness is appreciated in this step :D).


Then do the same on the back side of the paper.


When you put your paper on the wood, and trace over the lines again, the lead transfers onto the wood to leave a faint, but noticeable line to help you in your cutting.


This way, you don't have to print out your shape, cut it out, and trace repeatedly onto your wood surface.
See, easy.
Then you cut, sand, and paint them the desired color.


I traced some so they were in half, then painted and glued them at an angle so they looked like they were flying off the wall.
You could stop at this step, attach the ribbon bodies and hang away, but I took it a step further..
I used the same tracing technique on the WRONG side of some fabric (same fabrics used in Peyton's duvet cover..) and cut those out.
I then took Modge Podge (this is my new favorite finish of Modge Podge, Hard Furniture, I used it on her nightstand project too.) and adhered the fabric onto the appropriate butterfly.


After letting that dry well, I took my trusty emery board (some people call them a nail file) and sanded the edges so the raw fabric edges were clean.
I measured ribbon to two and a half lengths of the butterflies middle section, folded it in half and looped it through the other end, securing it around the body with a knot.
That gave them some cute little antennae and a great way to hang them.


Couldn't resist the cute quote from one of Merrill's favorite songs.. when it comes to his little girls, he loves this song.. but don't tell him I told you! ;)